
Tips for your First Multi-Day Ski Tour
Split into 3 parts, these articles will help you prepare for your first multi-day ski tour and serve as a recap if you are returning for your second or third tour.
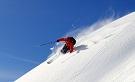
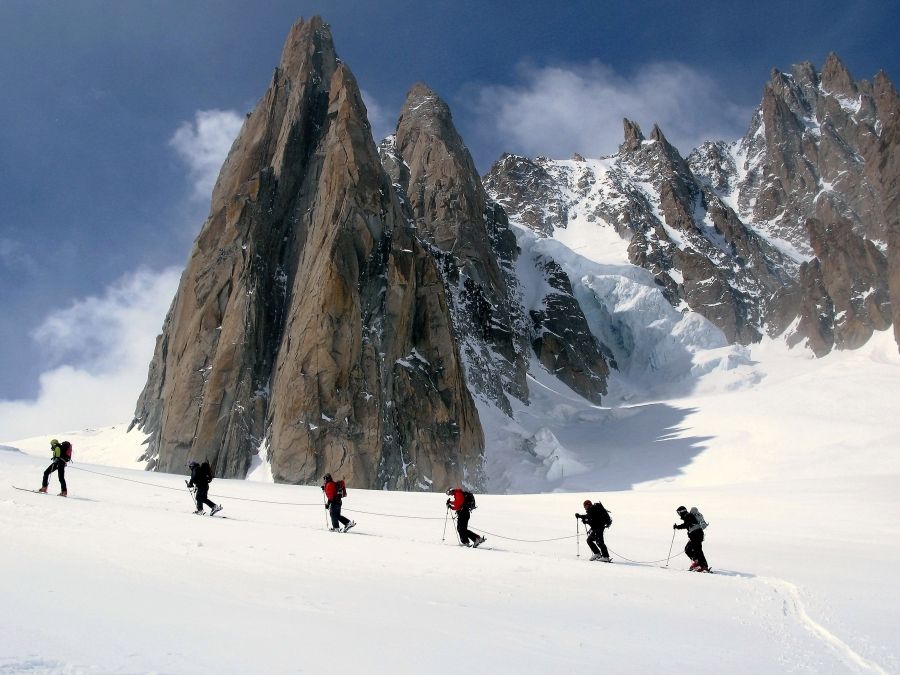
Adventurous skiers work their way though the transitions from piste skiing, then off-piste skiing and finally touring. As your skiing tastes become more refined you will be looking for the very best descents in the best snow. The longest and most beautiful descents are usually accessed on skins (unless there is a helicopter handy!) and after many years of ski guiding I can say for certain that the most memorable days involved a touring approach coupled with a long remote descent in great snow.
Touring can be strenuous or less-strenuous according to your route choice, certainly some routes involve 1000’s of meters of ascent where other trips use the ski lift system as well as skins. Some of the best descents can be accessed with just an hour or two of effort.
So if you are making your first ski touring adventure this year, these articles are for you. A little planning and preparation can increase your enjoyment, better your chances of success and allow you to begin the tour with more confidence.
In the first article in this series we are looking at getting the kit right for your first ski tour. As we move from piste to off-piste to touring, the gear changes too. When selecting your new touring set up, always go light weight while maintaining as much performance as possible. And as well as the skis on your feet you will have a rucksack on your back. A heavy pack turns your tour into a slog, so details are important. If unsure have a look at which gear the guide uses, you can guarantee his bag will not be unnecessarily heavy. Every item in your bag should be used at least once! Otherwise you shouldn’t have brought it (with the exception of a first aid kit and survival bag).
Avalanche Safety Gear
Just the same as when skiing off-piste; shovel, transceiver and probe are mandatory for the ski tourer. It’s difficult to go super light with these items without compromising the effectiveness of the gear. Your shovel needs to have a metal blade, and your probe needs to be at least 240cm. Grivel make a light weight steel tipped shovel which is specifically aimed at ski tourers. Regarding transceivers, there are a lot of great models available however we particularly recommend the BCA Tracker 2 beacon for its reliability and ease of use.
Skis and Bindings
As a rule wider, heavier planks are better for the downhill and narrower lighter skis easier for the uphill. Back in the day, skis were skis… but now the modern ski tourer has a bewildering choice of every size and weight to choose from. We recommend a compromise of both uphill and downhill performance. We don’t recommend big powder planks for multi-day touring (unless you have legs and lungs of steel), however ‘all mountain’ skis with touring binding work well.
To summarise: We can use our regular freeride/all mountain set-up equipped with touring bindings, or we can purchase a set of lighter dedicated touring skis. Using your freeride set up has the advantage of familiarity and uncompromised downhill performance but on the flip side this inevitably means more weight (see picture).
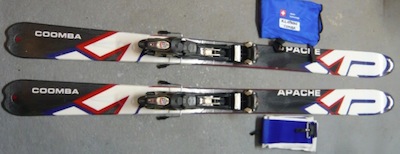
K2 Coomba with Marker touring bindings and Coltex skins. A freeride/touring set up with fantastic downhill performance, but weighty for the uphill
Your second choice is to buy dedicated touring skis, the main attribute being their light weight. But if you choose this option we recommend sticking with an underfoot measurement of at least 90mm, this will make a big difference in powder. We particularly recommend the new generation of touring/freeride skis such as the Trab Volare (see picture). These skis are light weight but retain a substantial foot print for the downhill.

Recommended: the Trab Volare, a light weight ski but with a 99mm waist. Built for both the up and the down!
Regarding bindings; again there is a wide choice available. Unless you are an experienced tourer we don’t recommend Dynafit or pin bindings, even though they are very light with excellent performance, the release mechanism is not as efficient as an alpine-style mechanism and can be difficult to take on and off quickly. We recommended the Diamir Fritschi range, for ease of operation and excellent performance.
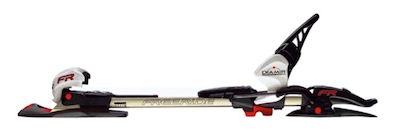
Diamir Fritschi ‘Freeride’ Binding
Mountaineering Gear
If your tour covers glacial terrain (most of the classic multi day trips do) or the ascent of high summits, you will need certain items of mountaineering gear. Of course, standard summer mountaineering kit is perfectly good for the winter and spring but we regard it too heavy for touring. Plus the snow is softer in the winter, thus we can substitute steel for aluminium/alloy crampons and ice axes. What’s more, the emphasis is on always on skiing rather than climbing, so we can safely make a compromise between weight and performance.
CRAMPONS:
We recommend aluminium or alloy dedicated ski touring crampons with antiball plates fitted. Although these light-weight models don’t have the ‘bite’ of steel, they are more than adequate for hard or soft snow and the occasional icy slope. Some people question the strength of aluminium, however I have used the same pair of Grivel aluminium touring crampons for 5 years, and they show minimal signs of wear and the metal has never bent!
Always make sure your crampon is well fitted to the boot, and please remember you may need longer straps for touring boots. Both 10 points and 12 point crampons are fine for touring and both the ‘clip-in’ and ‘cuff’ style bindings work well. We recommend a lightweight crampons bag for storage and to keep the contents of your pack neat and tidy.
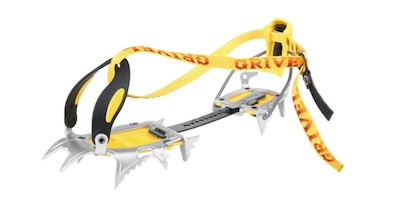
Recommended: The Grivel AirTech Light Crampon
ICE AXE:
When selecting an axe we use them same criteria as the crampons, we use lighter materials preferably designed specifically for touring. In addition we select a shorter handle length than for summer mountaineering, this means it sits flat on the rucksack and doesn’t create a hazard in the event of a fall. Regarding the pick: aluminium heads are light but are only useful for penetrating snow (not ice), so in response some manufacturers have added steel tips (just the end of the pick). Also, instead of aluminium some models have a forged alloy head, a nice compromise between weight and performance.
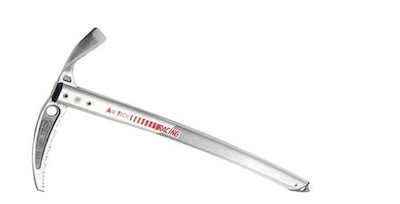
Recommended: Grivel AirTech Racing Axe
HARNESS:
Pretty much any climbing harness will do the job, but ideally we select a light model with good ease of movement. Personally I prefer the models which you don’t have to step in to, and can be fastened while standing up. The legs loops should not be tight, and you should be able to slip your hand but not fist between the leg loops and your leg. Please remember you could be wearing 2 or 3 layers on your legs while wearing the harness. Likewise the belt should fit snugly over your hips and should not be over tightened. The harness can be used both over and under your outer
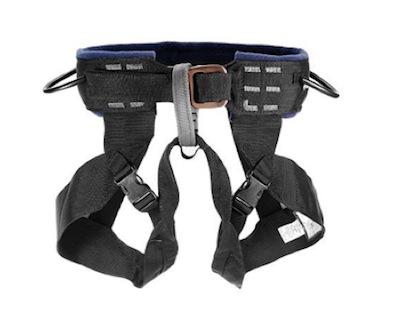
Recommended: Black Diamond ‘BOD’. A design classic, this harness has been in production for 20 years!
Clothing should be selected for warmth and ease of movement in mind. Temperatures can vary wildly when ski touring, so we have to pack for both warm and cold weather at the same time. You must only take exactly what you will, or may use in bad weather, excess clothing in the sac is a dead weight.
Key clothing items include:
• Light packable down jacket
• Shell outer layers and extra mid layers instead of insulated outer trousers and jackets
• A sun hat and neck protector (spring time)
• Smart wool (odour proof) under garments mountaintracks.co.uk/blog/how-prepare-your-first-multi-day-ski-tour

Recommended: Berghaus Lightweight, Packable 700 Fill Goose down Jacket
Regarding extras, please keep these to a minimum, to keep weight down. It is good to share first aid kits and repair kits with other group members, check what the guide is carrying so to avoid duplicate sets. Wash kits should be minimal, many of the huts don’t have running water, so a tooth brush and toothpaste (mini tube) plus a small pack of wet wipes is enough.
We are often asked about hydration systems, and our favourite is the old fashioned water bottle. I carry a litre of water per day and make sure I am fully hydrated before starting the tour each day. Please note on our website you can find comprehensive kit lists customised for every tour/trip we offer.
- Part 2 next week will cover fitness preparation before your tour -
Happy ski touring,
Matt
 Travel Website Development